Deployment
Continuous deployment
GWCelery is automatically deployed using GitLab’s continuous deployment features, configured through the project’s .gitlab-ci.yml file. Deployment can be managed through the GitLab project’s Environments page.
Python dependencies in the deployment environment are managed automatically using poetry.
There are two instances of GWCelery that are running on the LIGO-Caltech computing cluster and that are managed in this manner:
Minikube: The minkube instance is inteded for local development where all services that gwcelery interacts with are started locally. It uses the
gwcelery.conf.minikubeconfiguration preset.Dev: The dev instance is intended for the testing of branches with a live testing environment. It uses the
gwcelery.conf.devconfiguration preset.Test: The playground instance is re-deployed automatically on every push to the main branch. It uses the
gwcelery.conf.playgroundconfiguration preset.Playground: The playground instance is manually deployed for release/release-candidate tags manually deployed via gitlab. It uses the
gwcelery.conf.playgroundconfiguration preset.Production: The production instance is re-deployed only for reviewed releases and manually triggered through GitLab. It uses the
gwcelery.conf.productionconfiguration preset.
When we observe that the Playground instance shows correct end-to-end behavior, we have the option of triggering a re-deployment to Production. Deployment to production should preferably occur at a release. The procedure for performing a release is described below.
Danger
It is possible to start an interactive session inside the GWCelery production environment by logging in to the LIGO-Caltech cluster, but this measure should be reserved for emergencies only.
Any manual changes to the environment may disrupt the logging and monitoring subsystems. Any files that are manually changed, added to, or removed from the deployment environment will not be captured in version control and may be rolled back without warning the next time that the continuous deployment is triggered.
Making a new release
We prepare new feature releases branching from the tip of the main branch, while
bug-fix releases are prepared from the resulting release branches. We will
name release branches with only the MAJOR and MINOR tick, e.g. release/vMAJOR.MINOR.
Release versions appear with the PATCH digit i.e., the release name is vMAJOR.MINOR.PATCH.
Bug fix and emergency releases are generated from this release branch, with increment the PATCH
digit as necessary. Prior to a full release version, we also
create a release candidate. Hence, the first release in a release branch will be vMAJOR.MINOR.0rc1,
which is usually followed by the full release vMAJOR.MINOR.0.
GitLab is configured through the project’s .gitlab-ci.yml file to automatically build and push any tagged release to the Python Package Index (PyPI). Follow these steps when issuing a release in order to maintain a consistent and orderly change log.
Create a release branch Unless this is an incremental PATCH release, like a bug-fix, the first step is to create a release branch from the tip of main.
git checkout -b release/vMAJOR.MINOR && git push -u origin release/vMAJOR.MINORIf this is a bug-fix, or a patch release, then the existing release branch can be used for making the release. In that case, checkout the appropriate release branch. This assumes that you have push access to the main repository which
originrefers to.Pick a release codename. GWCelery releases are named after cryptids. The release codename is at the discretion of the librarian doing the release. Pick the name of a cryptid for the release (see these lists of cryptids for inspiration).
Check the pipeline status. Before you begin, first make sure that the unit tests, documentation, and packaging jobs are passing. Consult the project’s GitLab pipeline status to make sure that all of the continuous integration jobs are passing on the release branch.
If necessary, fix any bugs that are preventing the pipeline from passing, push the changes to release branch, and repeat until all jobs pass.
Update the change log. The first subsection of the change log file, CHANGES.rst, should have the title
MAJOR.MINOR.PATCH
(unreleased)
, whereMAJOR.MINOR.PATCHwill be the version number of the new release. Review the git commit log.Make any necessary changes to CHANGES.rst so that this subsection of the change log accurately summarizes all of the significant changes since the last release and is free of spelling, grammatical, or reStructuredText formatting errors.
Review the list of changes and make sure that the new version number is appropriate. We follow SemVer very loosely, and also generally bump at least the minor version number at the start of a new LSC/Virgo engineering or observing run.
Commit and push any corrections to CHANGES.rst to the release branch.
Tag the release. Change the title of the first section of CHANGES.rst to
MAJOR.MINOR.PATCHrc1 "Codename" (YYYY-MM-DD)whereYYYY-MM-DDis today’s date andCodenameis the release codename. Commit with the messageUpdate changelog for version MAJOR.MINOR.PATCHrc1 "Codename".Create a git tag to mark the release by running the following command:
$ git tag vMAJOR.MINOR.PATCHrc1
-m "Version MAJOR.MINOR.PATCHrc1"
Note that once the release candidate
rc1passes the acceptance tests, we perform the full release.Push the new tag and updated change log. Push the new tag and updated change log:
git push && git push --tagsYou will need the appropriate permission to push the new tag. If required, contact one of the maintainers.
Wait a couple minutes, and then verify that the new release has been published on our PyPI project page, https://pypi.org/project/gwcelery/.
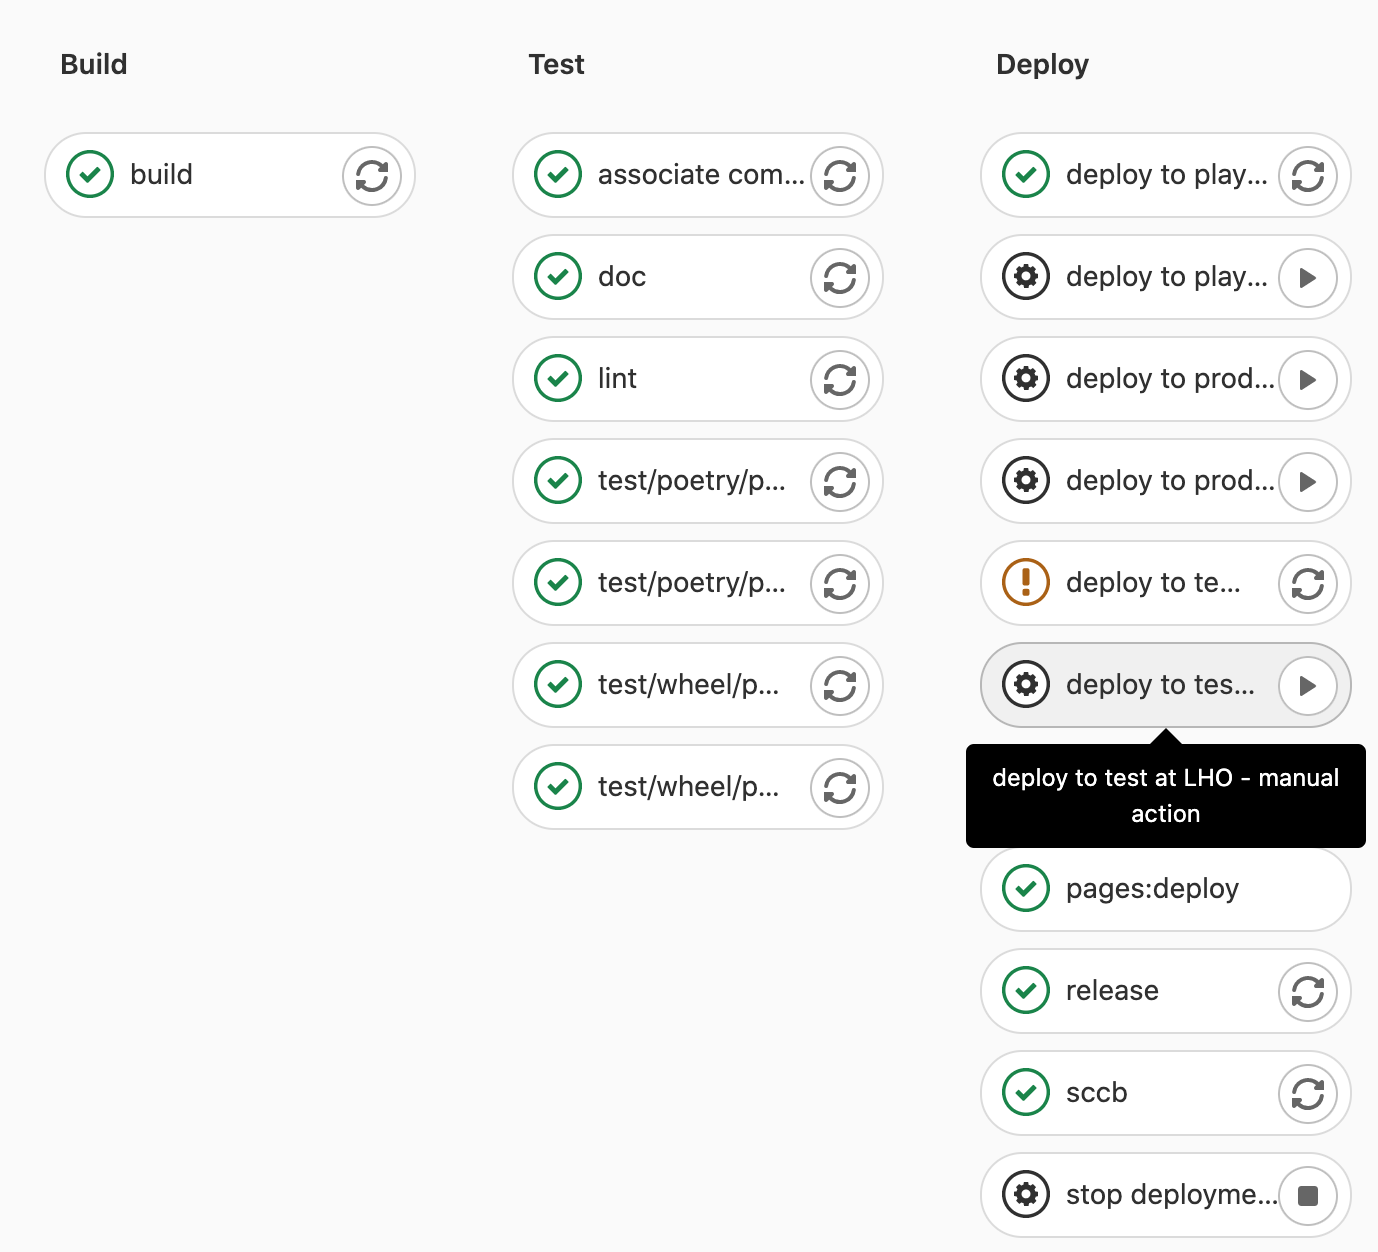
Deploy release candidate and complete the acceptance tests. Deploy the new
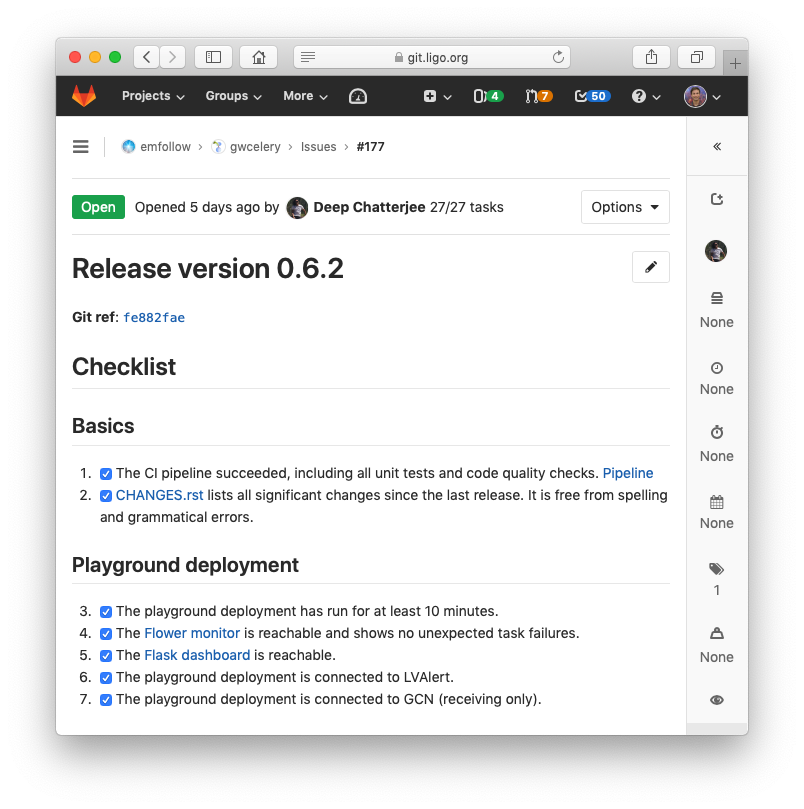
rcversion to the playground instance using the gitlab manual deployment stage in the pipeline. Once successfully deployed, complete the acceptance tests.Our acceptance tests consist of a manual checklist for verifying that the pipeline satisfies certain requirements on the playground environment. The checklist is maintained as a GitLab issue template and is under version control in the special directory .gitlab/issue_templates.
Create a new issue in GitLab. Set the title to
Release version
MAJOR.MINOR.PATCH
. In theChoose a templatedropdown menu, selectCreate a Release. The description field will be automatically populated with the checklist. Submit the issue.Complete the items in the checklist and check them off one by one on the release issue before proceeding to the next step. On occasion, an external service like GCN might not be available. If so, cross out the checklist item and note the reason.
If necessary, repeat steps 4-7 until acceptance tests pass. As necessary, commit changes to the release candidate branch and increment the release candidate number, e.g.
1->2. In the process, add entries in the changelog as needed and update thercdigit.Make full release Once the acceptance tests pass, update the changelog removing the release candidate naming i.e. the title should read
MAJOR.MINOR.PATCH "Codename" (YYYY-MM-DD). When updating the changelog (see step 4), append; closes #NwhereNis the release issue’s number. Add tag based on full release, avoiding thercNsuffix in the tag name (see step 5). Once the release is done, deploy it in the playground environment allowing it to run for an extended period of time based on review requirements. Accordingly create SCCB ticket by running the appropriate pipeline stage.Note that all tags including release candidates and full releases live on the release branch.
Synchronize with the main branch Cherry-pick the changelog commits from the latest release into the main branch. Cherry-pick any additional commits that were added to fix bugs or otherwise that does not exist in the main branch.
git checkout maingit cherry-pick <SHAs-from-release-branch>Resolve merge conflicts if any. During a cherry-pick
git cherry-pick --continueandgit cherry-pick --abortmaybe helpful.Create a change log section for the next release. Add a new section to CHANGES.rst with the title
NEXT_MAJOR.NEXT_MINOR.NEXT_PATCH
(unreleased)
, whereNEXT_MAJOR.NEXT_MINOR.NEXT_PATCHis a provisional version number for the next release. Add a single list item with the textNo changes yet.Commit with the messageBack to development.Push the changes tomainonce complete.If desired, navigate to the GitLab project’s Environments page and trigger a deployment to production.
Each pipeline has an interface which enables deployment to the available environments.